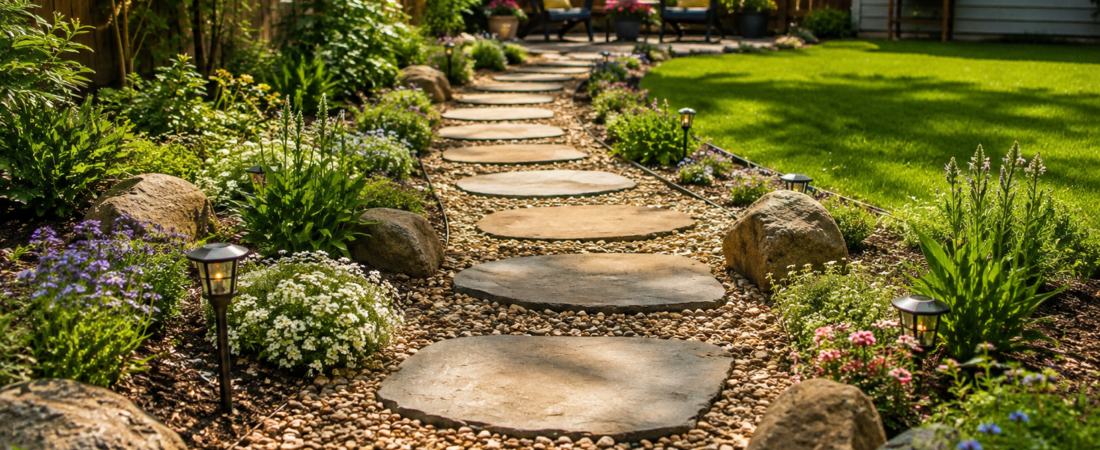
Inexpensive stepping stone walkway ideas using gravel, concrete, brick, wood, and natural stone for a beautiful yard on a budget. Inexpensive stepping stone walkway ideas can completely change the feel of a yard without turning a simple landscaping project into an expensive renovation. A walkway does more than connect the driveway to the front door or the patio to the garden. It can guide visitors through your outdoor space, protect grass from foot traffic, and add a little personality to an otherwise plain yard. The good news is that you do not need expensive stone, professional installation, or a huge landscaping budget to create something attractive. With basic pavers, reclaimed materials, gravel, mulch, or even homemade concrete stones, you can build a walkway that feels intentional and welcoming.
Why Choose a Stepping Stone Walkway?
A stepping stone path is one of the easiest ways to add structure to a garden or backyard. Unlike a fully paved walkway, it does not require covering the entire area with concrete or expensive pavers. You can place individual stones along a natural walking route and use inexpensive materials between them. This approach also works particularly well in gardens because the spaces around the stones can remain green or be filled with gravel, ground cover, or mulch. If you enjoy DIY landscaping, a stepping stone walkway is also a project you can complete gradually instead of spending a large amount of money at once.
1. Concrete Stepping Stones on Grass
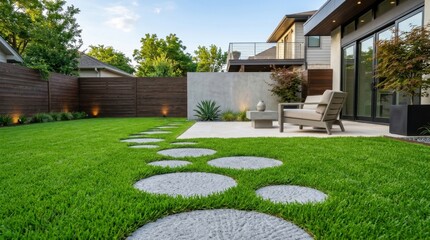
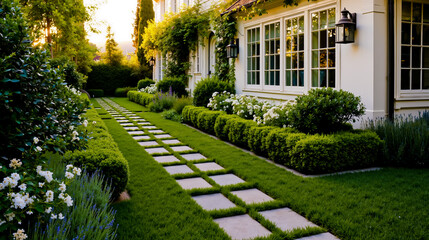
Simple concrete stepping stones are among the most practical budget options for a walkway. Basic square, rectangular, or circular pavers are widely available, and their simple appearance can actually work well with modern, traditional, and casual landscaping. Place them directly across a lawn with enough space for comfortable steps, then carefully cut the grass around each stone so the walkway looks established rather than randomly scattered. For an even more finished appearance, set each stone slightly into the soil so its surface sits close to the level of the surrounding lawn.
2. Gravel and Stepping Stone Combination
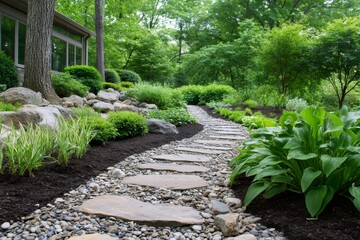
Combining inexpensive gravel with a few larger stepping stones is a smart way to reduce material costs while still creating a defined pathway. Instead of purchasing enough stone to cover the entire walkway, use larger pieces only where people will walk and fill the surrounding area with pea gravel or another affordable aggregate. The contrast between the solid stones and loose gravel can give the path a relaxed garden appearance. It is especially useful for connecting outdoor seating areas, sheds, flower beds, and backyard gates.
3. Reclaimed Brick Walkway
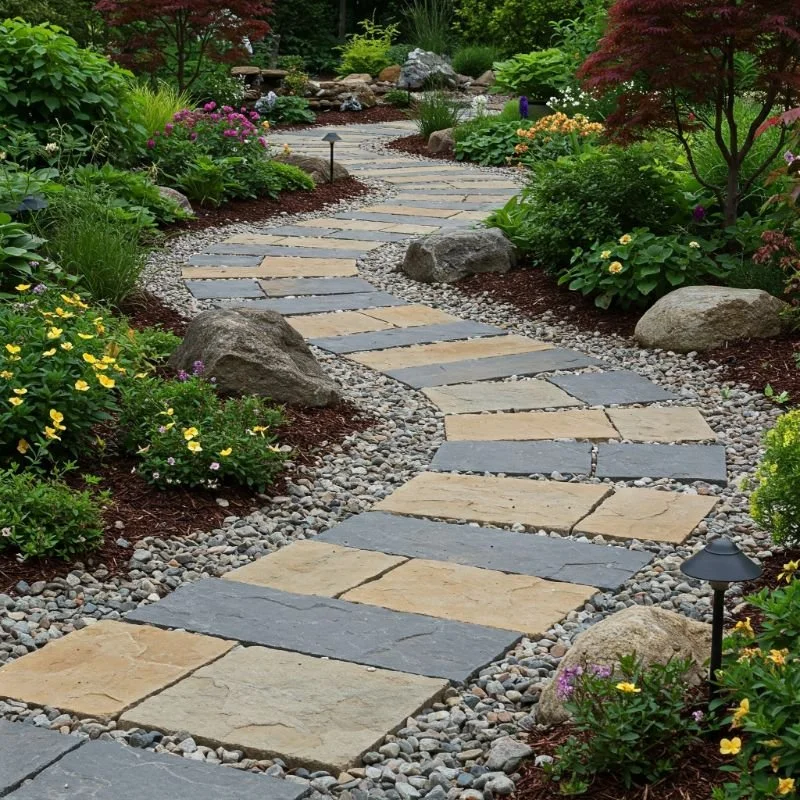
Old bricks can give a stepping stone path a warm, established appearance without requiring brand-new landscaping materials. Reclaimed bricks from renovation projects, salvage yards, or local listings may be available for considerably less than new decorative pavers. You can place individual bricks as stepping surfaces or combine several pieces to create wider stepping areas. Slight differences in color and texture are not necessarily a problem; in fact, they can make the walkway feel more natural and give your garden some character.

4. Natural Stone Stepping Path
Natural stones can create one of the most attractive walkway designs, particularly when the path runs through a garden filled with plants and shrubs. Look for relatively flat stones with stable surfaces rather than choosing pieces based only on appearance. The goal is to make every step comfortable and secure. If natural stone is expensive in your area, check whether local landscaping suppliers sell irregular or leftover pieces at reduced prices. A slightly uneven arrangement can look beautiful when surrounded by gravel, moss, or low-growing plants.
5. DIY Concrete Stepping Stones
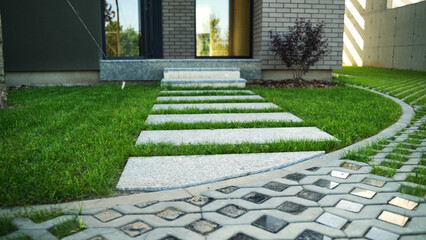
Making your own stepping stones can be a great choice when you have more time than money. Concrete mix, simple molds, and a few decorative materials can produce customized stones for a fraction of the cost of some premium pavers. You can keep them plain for a clean modern look or add small pebbles, patterns, leaves, or pieces of tile while the concrete is setting. Homemade stones also allow you to choose the size and shape that best fits your yard, which can be useful when working around existing plants or unusual garden layouts.
6. Mulch Path With Stone Centers
If you want a softer, more natural-looking walkway, consider using inexpensive mulch around your stepping stones. Wood mulch can fill the space between stones while helping define the route through a garden. The stepping stones provide a stable surface underfoot, while the mulch gives the walkway a woodland or cottage-garden feel. This idea works particularly well around trees and planting beds where a formal paved path might look out of place. Keep the mulch reasonably contained so it does not spread onto nearby lawns or patios.

7. Stepping Stones Surrounded by Grass
A simple row of stepping stones through a lawn can be surprisingly attractive. You do not need gravel, mulch, edging, or other decorative materials if you prefer a clean and uncomplicated design. Position each stone according to a comfortable natural stride and make sure the stones are level and stable. This approach is particularly inexpensive if you already have a healthy lawn. The green grass creates a natural frame around the stones, giving the walkway a fresh appearance without adding much to the overall cost.

8. Pea Gravel With Large Pavers
Pea gravel is another useful material for budget landscaping because it can cover a relatively large area without the expense of solid paving. Use it as the foundation or surrounding surface and place large pavers through the center of the walkway. The result is a path that feels more substantial than a simple line of stepping stones while still using fewer hardscape materials. A narrow border along each side can also help keep the gravel contained and make the finished walkway look more organized.

9. Recycled Concrete Pieces
Broken concrete does not always have to become waste. Pieces from an old patio, walkway, or construction project can sometimes be reused as stepping stones if they have safe, reasonably flat surfaces. Arrange them carefully so sharp edges are not exposed and make sure every piece sits firmly on the ground. The irregular shapes can create an attractive informal path, especially in a rustic garden. Before using salvaged concrete, inspect every piece for stability and avoid anything that is badly cracked or unsafe.

10. Wooden Stepping Sections
Wood can bring warmth and a rustic feel to an outdoor walkway. Small timber sections, reclaimed boards, or rounds cut from suitable fallen branches can sometimes be used as stepping surfaces. However, wood requires more maintenance than concrete or stone because constant exposure to moisture can eventually cause rot. If you choose this option, use outdoor-rated or appropriately treated wood and provide good drainage underneath. Wooden stepping sections are particularly appealing around vegetable gardens, cabins, woodland-style yards, and informal outdoor spaces.

11. Large Pavers With Ground Cover
Instead of filling the spaces between stepping stones with gravel, you can use low-growing ground cover to soften the walkway. Large pavers surrounded by greenery create a natural transition between hardscape and garden plants. This design can make an inexpensive path appear much more established over time as the plants spread around the stones. Choose ground cover that suits your local climate and the amount of sunlight the walkway receives. Keep the plants low enough that they do not cover the walking surface or make the stones difficult to see.

12. Round Stepping Stones for a Softer Look
Round stones can give a walkway a softer, less formal appearance than square pavers. They work especially well when the path curves through a garden rather than following a straight line. You can use similarly sized circular stones for a neat appearance or mix different sizes for a more relaxed design. The key is to maintain a comfortable walking rhythm. If the stones are too far apart, visitors may have to stretch between them, while stones placed too close together can make the walkway look unnecessarily crowded.
13. Create a Curved Stepping Stone Path
A curved walkway can make a small yard feel more interesting because it encourages the eye to move through the landscape rather than stopping at a straight line. Fortunately, a curve does not necessarily require expensive materials. You can use affordable concrete pavers, reclaimed bricks, natural rocks, or basic stepping stones and simply arrange them along a gentle route. Before installing anything permanently, lay the stones on the ground and walk the proposed path several times. This simple test can reveal whether the curve feels natural and whether the stepping distance is comfortable.
14. Use Leftover Landscaping Materials
One of the best ways to save money is to use materials you already have. Leftover patio pavers, spare bricks, unused gravel, flat landscaping rocks, and even suitable pieces from an old garden project can become part of a new walkway. Mixing materials does not automatically make a design look messy. In an informal garden, different textures and shapes can create a deliberately relaxed appearance. Try to repeat at least one material or color throughout the path so the finished design feels connected rather than completely random.

15. Narrow Garden Stepping Path
You do not always need a wide walkway. If the path is mainly for reaching flower beds, a backyard shed, a garden gate, or a small seating area, a narrow stepping path may be all you need. Fewer stones mean fewer materials, less digging, and less installation work. Keep the route comfortable for one person and choose stones that provide enough room for a secure foot placement. A narrow path can also preserve more planting space, which is useful in smaller yards where every square foot matters.
How to Make a Cheap Walkway Look Expensive
The secret is not necessarily the price of the materials. It is the way you arrange them. Keep the spacing consistent, make sure the stones are stable, and define the edges where necessary. A simple walkway can look polished when the surrounding grass is neatly trimmed and the gravel or mulch is evenly distributed. You can also add inexpensive solar lights, small plants, or a clean border to give the path more visual structure. In other words, careful installation often matters more than choosing the most expensive stone available.
How Far Apart Should Stepping Stones Be?
For a comfortable adult walkway, stepping stones are commonly positioned so that the center of one stone is roughly one normal walking step from the center of the next. However, there is no single measurement that works for every person or every walkway. The easiest approach is to place the stones temporarily and walk across them naturally. Your feet should land comfortably on the stones without forcing you to take unusually large or tiny steps. For paths frequently used by children, older adults, or people carrying items, keeping the stones somewhat closer together can make the route easier to use.
Should Stepping Stones Be Set in Concrete?
Most garden stepping stones do not need to be permanently set in concrete. For a simple residential path, stones can often be installed over a properly prepared base of compacted soil, sand, or gravel. Setting them correctly is more important than simply placing them on top of the ground. The area underneath should be reasonably level and firm so the stone does not wobble when someone steps on it. Concrete may be useful for certain permanent installations, but avoiding it can make a DIY project cheaper, simpler, and easier to modify later.
How to Install an Inexpensive Stepping Stone Walkway
Start by deciding where people naturally want to walk instead of forcing the path into an awkward location. Mark the route, place your stones temporarily, and test the spacing by walking across them. Once the layout feels right, remove the grass or loose soil beneath each stone and create a shallow, level base. Add a small amount of sand or compactable material if needed, position the stone, and check that it does not rock when stepped on. Finish by filling gaps with gravel, mulch, soil, or suitable ground cover depending on the style you want.
Common Mistakes to Avoid
Even an inexpensive walkway should not sacrifice safety. Avoid using stones that are extremely thin, unstable, sharply broken, or excessively slippery when wet. Do not place stepping stones so far apart that visitors have to stretch between them. Another common mistake is leaving stones significantly higher than the surrounding ground, which can create a tripping hazard when people are walking naturally. Poor drainage can also cause stones to shift over time, so consider where rainwater will travel before completing the installation.
Ways to Save Even More Money
The biggest savings usually come from reducing how much material you actually need. Instead of paving the entire route, use individual stones with inexpensive gravel or mulch between them. Look for leftover landscaping materials, reclaimed bricks, local stone, or discounted pavers before buying everything new. Planning the walkway carefully also prevents waste. Measure the approximate route first, decide how many stones you need, and avoid purchasing decorative extras until the basic path is complete. A simple design that is installed well will usually look better than an expensive design filled with unnecessary materials.
Which Material Is Best for a Budget Walkway?
For most homeowners, basic concrete pavers offer a good combination of affordability, durability, and easy installation. Gravel is excellent for filling larger areas between stones, while reclaimed brick provides more character when it can be sourced cheaply. Natural stone offers a beautiful organic appearance but can become expensive depending on availability. Wood is attractive for rustic settings but generally requires more maintenance. The best choice ultimately depends on what is affordable and readily available in your area, as local material prices can vary considerably.
Conclusion
Creating an attractive walkway does not have to mean spending thousands on professional landscaping. The best inexpensive stepping stone walkway ideas focus on using materials wisely and making the path feel like a natural part of the yard. Concrete pavers, reclaimed bricks, natural rocks, gravel, mulch, grass, and homemade stones can all work when they are installed carefully. Start with the route, think about how the walkway will actually be used, and then choose materials that fit your budget and the character of your outdoor space. Sometimes a simple row of well-placed stones is all it takes to turn an ordinary yard into a much more inviting place.
FAQs
What is the cheapest material for a stepping stone walkway?
Basic concrete stepping stones are often one of the most affordable choices, especially when combined with inexpensive gravel, mulch, or existing grass. Reclaimed bricks and salvaged materials can be even cheaper if you can find them locally at little or no cost.
How can I make a stepping stone path cheaply?
Use individual pavers rather than paving the entire walkway, then fill the spaces with grass, gravel, mulch, or inexpensive ground cover. You can save even more by using reclaimed bricks, leftover landscaping materials, or DIY concrete stepping stones.
Do stepping stones need a base?
A prepared base is recommended because it helps keep stones level and stable. Depending on the soil and walkway design, this may involve removing loose soil and adding compacted gravel, sand, or another suitable base material.
How far apart should stepping stones be?
The stones should be spaced according to a comfortable natural walking stride. A practical method is to place them temporarily and walk across the proposed path before installing them permanently.
Can I put stepping stones directly on grass?
Yes, stepping stones can be installed in a lawn, but they should be positioned securely and preferably set close to the surrounding ground level. Removing a shallow section of grass and soil beneath each stone can help prevent rocking and tripping.